You can install Windows 11 without a Microsoft account by following our straightforward step by step guide
How to install Windows 11 : You have the option to install Windows 11 even without a Microsoft account, which might seem like magic. Despite Microsoft’s increasing encouragement for users to create accounts since the OS’s launch in late 2021, you’re not obligated to succumb to this pressure.
If you’re confident in your abilities, you can confidently install and utilize Windows 11 without needing to establish a Microsoft account. While many individuals may instinctively create one without much thought, there are valid reasons not to do so. For instance, if you’ve recently purchased a Windows 11 license or upgraded from Windows 10. Additionally, you might prefer to maintain privacy, have concerns about security, or simply need to set up a Windows 11 device for a child’s use.
Whatever your motivations, our step-by-step instructions below will walk you through the process of installing Windows 11 without requiring a Microsoft account.
How to install Windows 11 without a Microsoft account
- Create a Windows 11 boot disk
- Go through the Windows 11 install until “Is this the right country or region?”
- Hit Shift + 10 then type “OOBE\BYPASSNRO”
- Once your PC reboots, type “IPCONFIG/RELEASE” to disable internet access
- Continue with the installation, then click “I don’t have internet”
- Choose a local account username and password
- Complete the Windows 11 install process
1. Create a Windows 11 boot disk
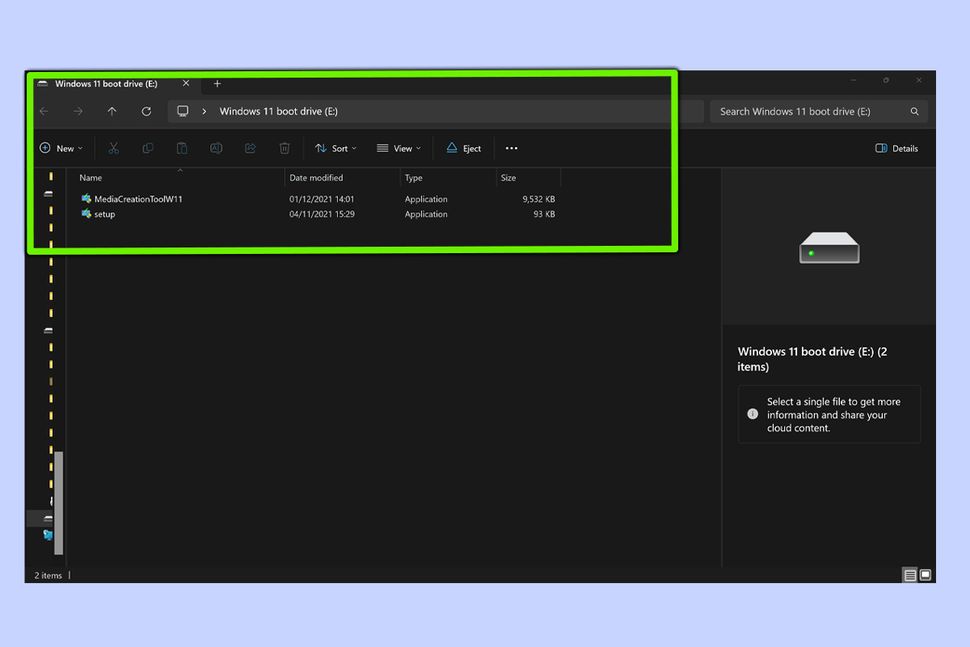
First you need to create a Windows 11 book disk/Installation Media on a USB stick before you can run the OS without a Microsoft account. You can do this for free from the Microsoft Support site. Then restart your PC or laptop, where you should be presented with the Windows 11 install screen, though please note you may have to set the USB stick as your boot device first, which involves entering the BIOS screen when you boot. This can normally be done by pressing either F2 or Delete when the manufacturer’s logo appears.
2. Go through the Windows 11 install until “Is this the right country or region?”
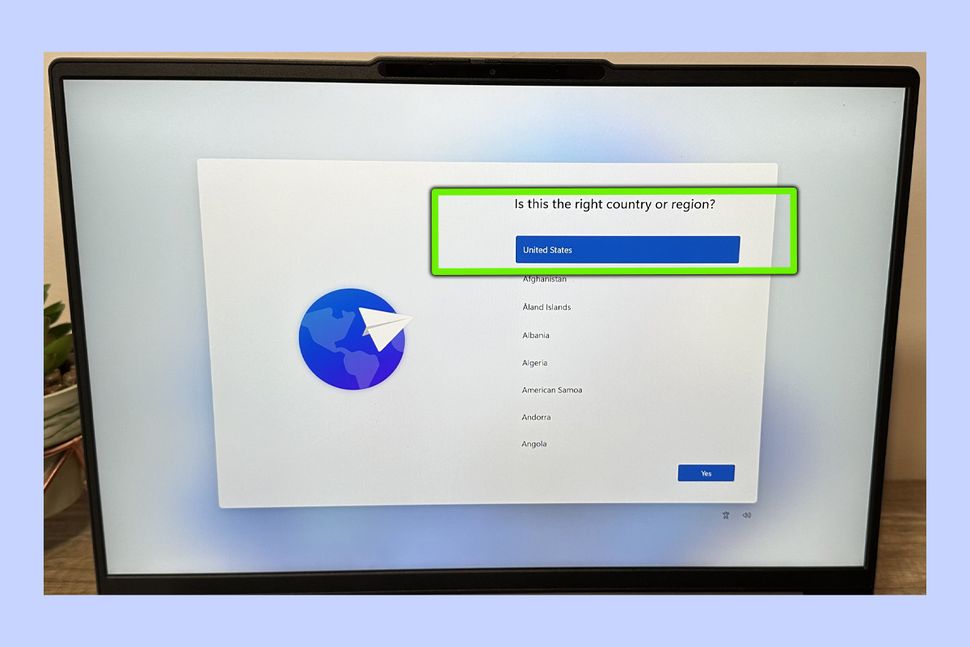
Once you’ve launched the boot disk after restarting your PC or laptop, it’s time to start the Windows 11 installation process. You can skip through the steps until the “Is this the right country or region” screen, which marks the point that you need to switch off your internet connection.
3. Hit Shift + 10 then type “OOBE\BYPASSNRO”

To start the process of disabling your connection, press Shift + F10 on your keyboard until the Windows 11 command prompt appears on the country select screen — please note, on certain keyboards you need to press Fn + Shift + F10.
In the cmd line, type “OOBE\BYPASSNRO“ (minus the quotation marks), then hit Enter to reboot your PC and return to the command prompt.
4. After restart, type “IPCONFIG/RELEASE” to disable internet access

Once your PC reboots, to turn off your internet, press Shift + F10 then type “IPCONFIG/RELEASE” (minus the quotation marks) and hit Enter. Remember: disabling your connection is an essential part of installing and running Windows 11 without a Microsoft account. You can now close the command prompt.
5. Continue with the installation, then click “I don’t have internet”

The following step obviously involves being a bit “creative” with the truth, but there you go. Once you’re out of the cmd line and back at the Windows 11 install screen, choose your region, keyboard layout and/or input method. After this is done, the “Let’s connect to a network” screen will appear. Click the “I don’t have internet” button on the bottom right to continue. You’ll then need to click “Continue with limited setup”.
6. Choose a local account username and password

After reviewing the License Agreement, Windows 11 will prompt you to create a local account so you can login. This is not the same as creating an online account because it’s not linked to an email address, so don’t worry. When the “Who’s going to use this device?” screen pops us that’s your cue to enter a local username and password and click Next once you’ve set both.
7. Complete the Windows 11 install process

The final step involves choosing and setting three simple security questions (like the name of your pet and the city you were born in). Once you’ve input these the Windows 11 install process will be complete and the OS will launch shortly afterwards, where you’ll be greeted by the familiar login screen.
And that’s it! After your PC restarts, you can log in and access Windows 11 without requiring a Microsoft account. However, there’s a small catch. As noted earlier, Microsoft is increasingly prompting users to create an account through alerts. While the steps outlined above are correct as of now, there might be a time in the future when installing Windows 11 with a Microsoft account becomes compulsory.